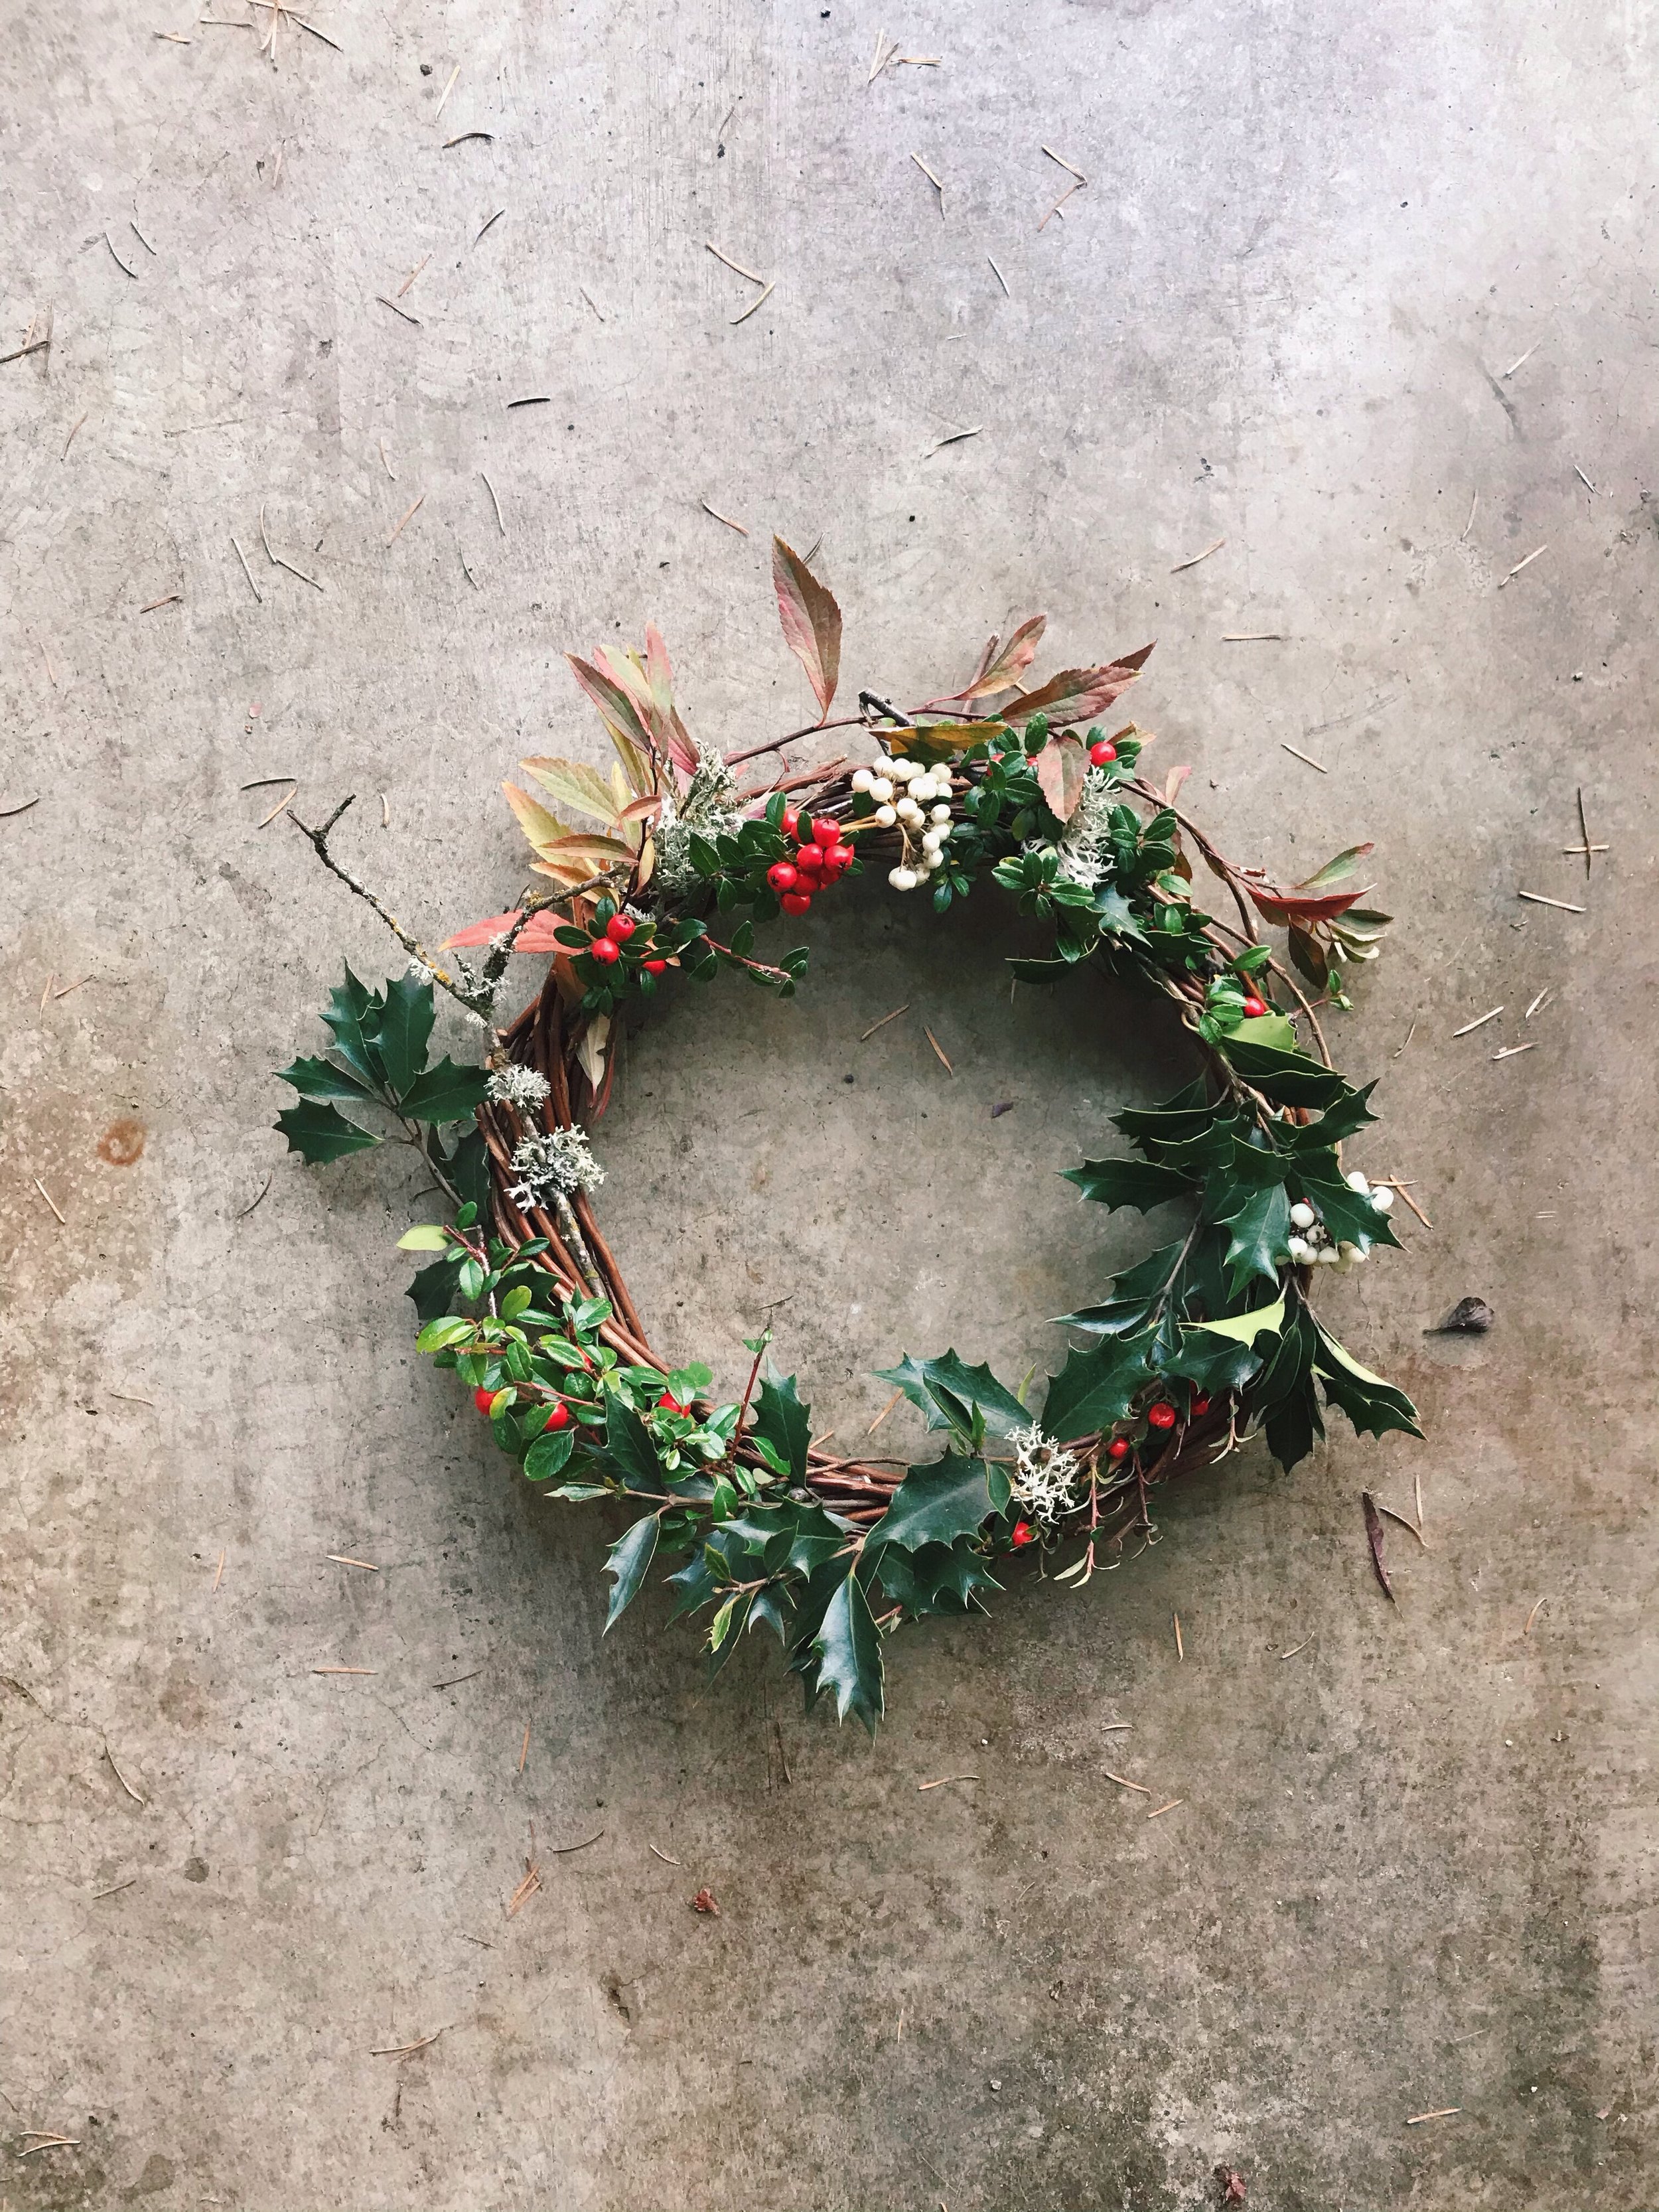
Wreaths

IMG_4835.JPG
 

I love art projects related to Christmas! Wreath making is the first Christmas project I do each year.

 
FullSizeRender.jpg
Christmas Wreath jaclynsue.com
 

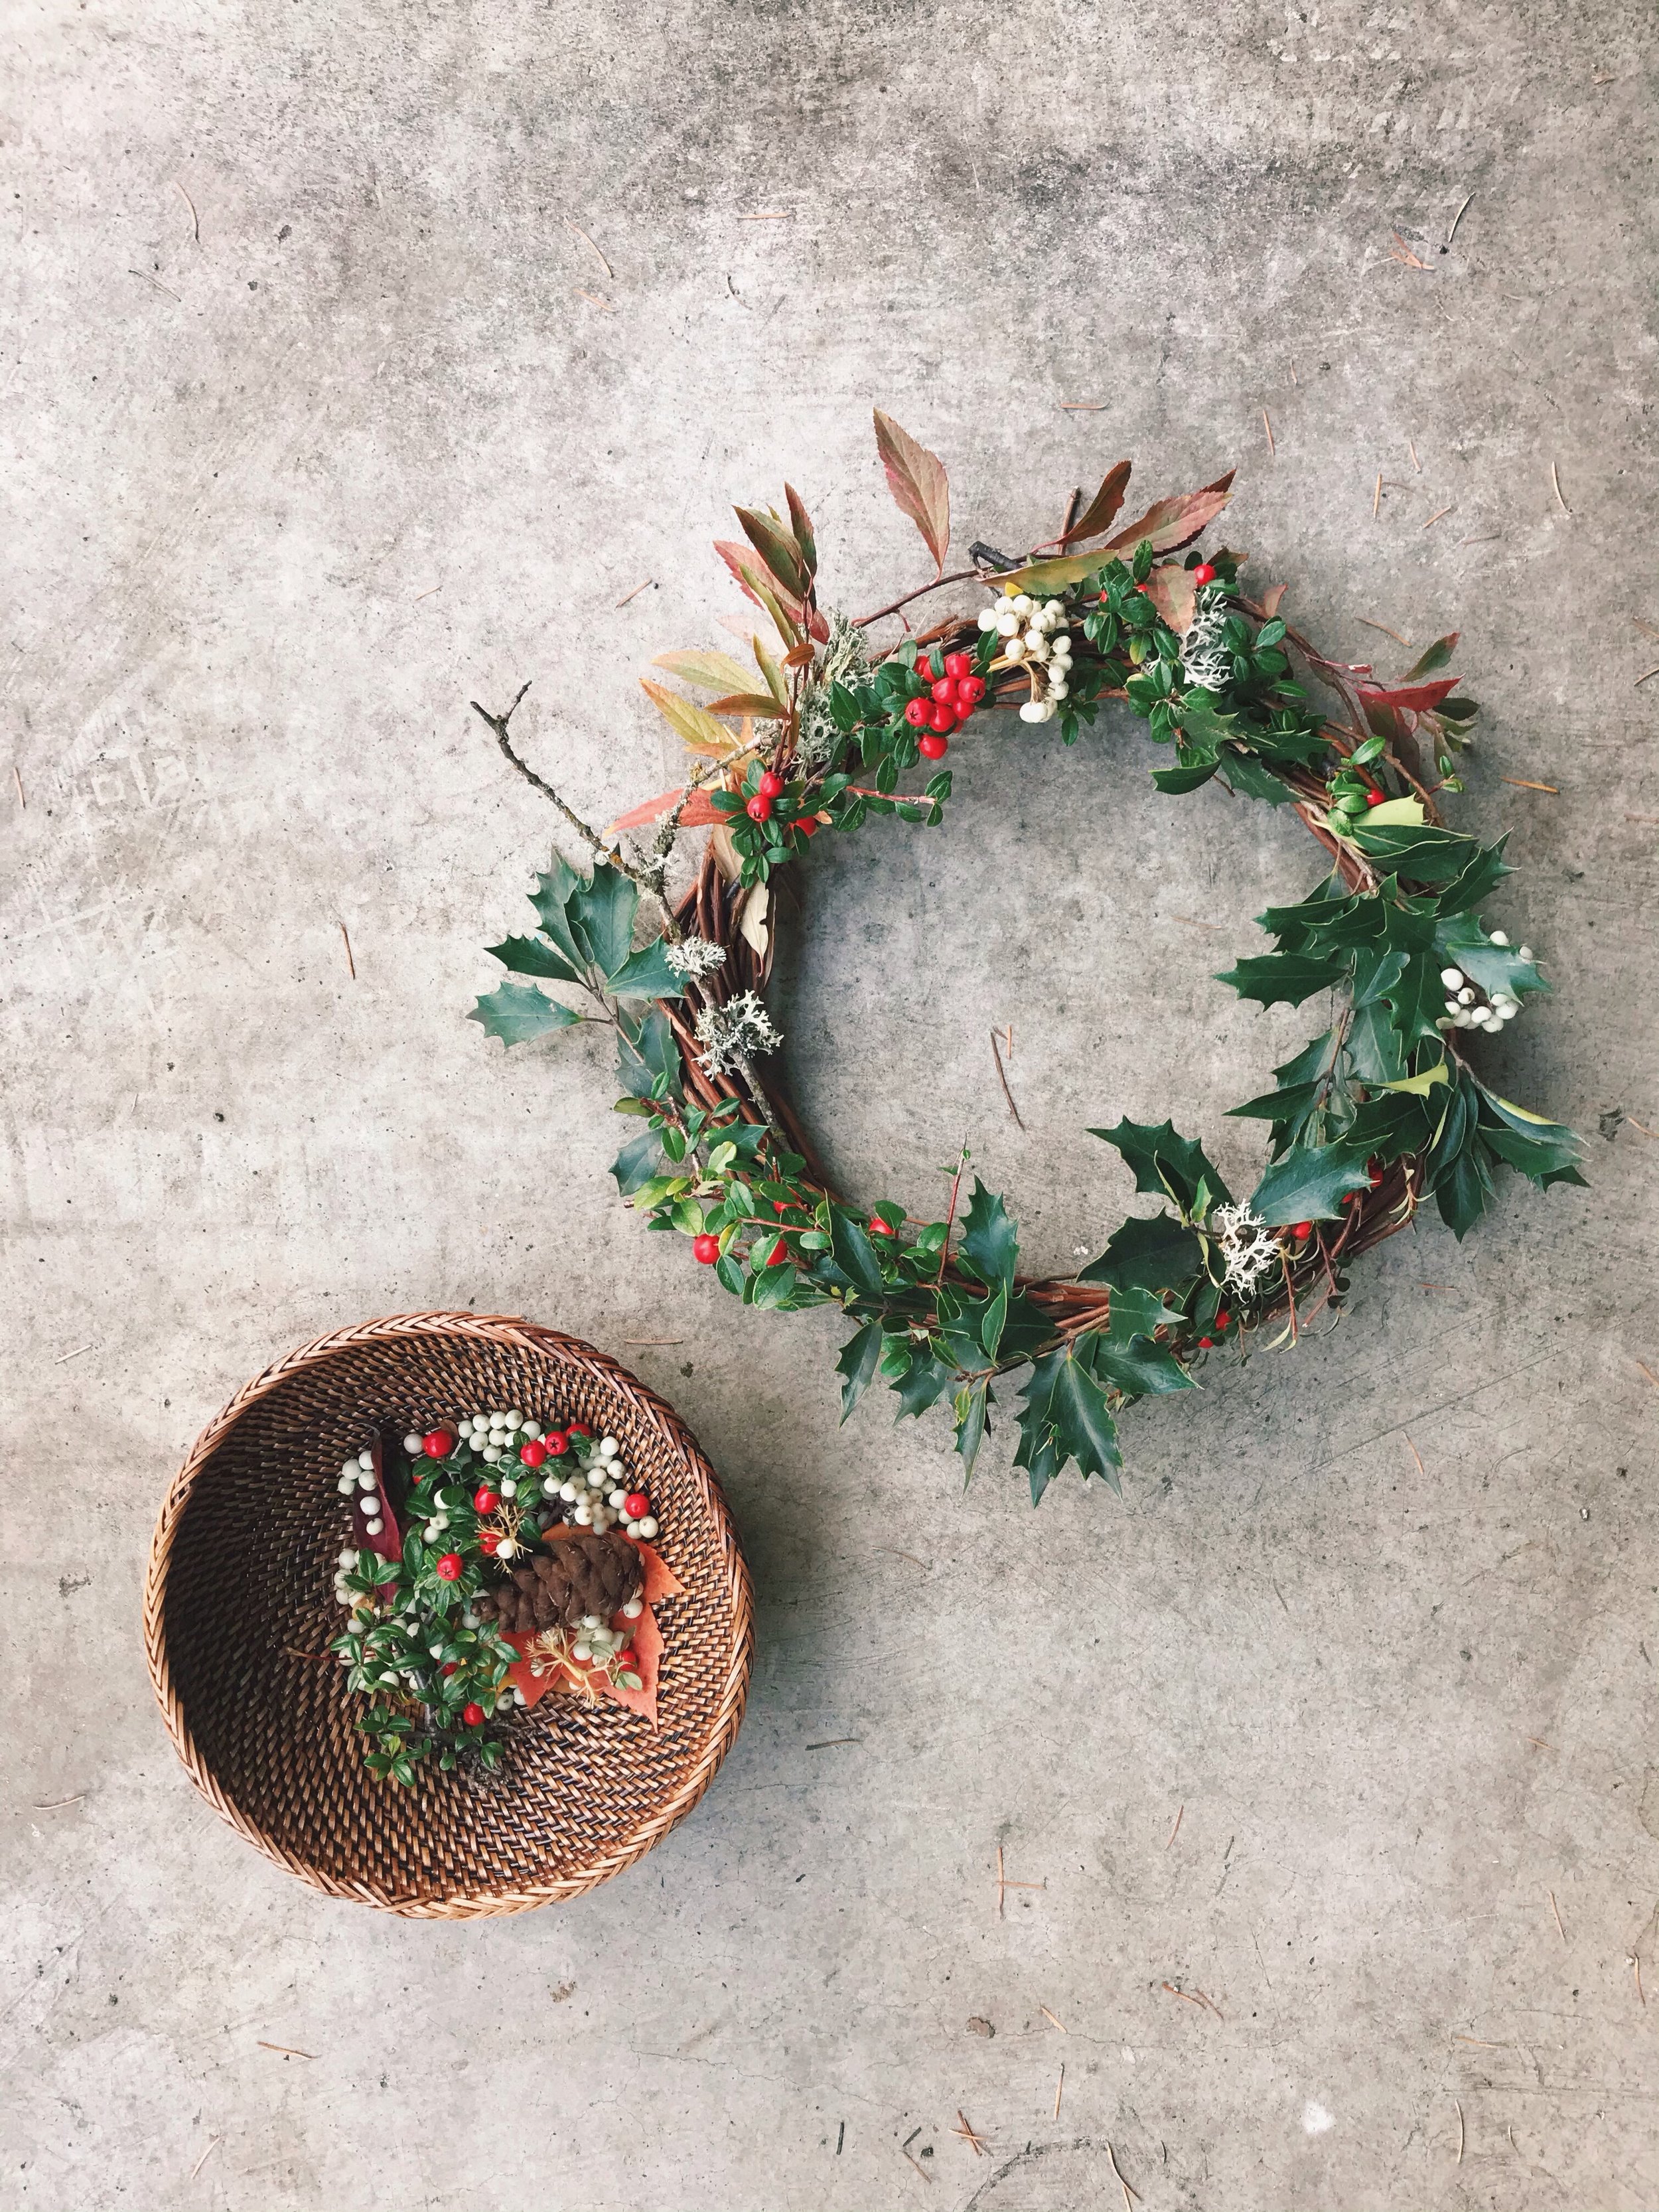
This year Noël is old enough to understand what I am doing, so I incorporated gathering my wreath materials with an exploration walk. I let her collect things along the way to bring home. I think she got some pretty good stuff in her discovery basket, don’t you think?

 
IMG_4799.JPG
 

Materials: wreath base (I got mine at dollar tree!), scissors/ trimmers, berries, leaves, pine cones, twigs, anything in nature you would like to add to your wreath, (optional: hot glue, wire)

 
FullSizeRender.jpg
IMG_4796.JPG
 

STEPS:
1. Make all your foliage visible so you can see exactly what you have
2. Decide if you are going to have all your leaves going in one direction or if there is going to be a center and two different directions. Take the bigger branches to fill up your wreath first.
3. Start by tucking in branches to the base (later on you can glue or add wire to secure your branches)
4. Fill in the in between areas with smaller branches/berries/pine cones or even flowers!
*glue or add wire for security

 
IMG_4801.JPG

#ilovechristmas

Inspiring Weaves

IMG_8687.JPG
 

Our most recent stay in Portland, Oregon was at the lovely Hi-Lo Hotel, Autograph Collection.  If you enjoy home decor, I definitely suggest you stop by their lobby.  I found their modern and minimalist styling to be very inspiring.  One of my favorite pieces was of course the hanging wall weave.  It is rare to see a large hanging weave because that usually requires a larger loom (which is hard to come by) and a lot more material. I felt like this one was nicely done and without too much flare. A simple ombre and organized fringe made this piece a beautiful focal point of the room. 

My take home from this piece is: 
1. a two color wall weave IS interesting
2. I appreciate vertical organized fringe
3. the placement of this piece works (usually with a longer blank wall I would assume there would be a weave would run longer, east to west. But I believe this weave looks great in this space)

I think I should start weaving again.. here are some of my old weaves I did for fun


diy| Rock Rings

IMG_7884.PNG
 

This DIY project comes to you from Pasadena's Arroyo Seco Festival. The festival culture is definitely changing.  No longer is there just music, but now it kind of reminds me of a fair.  There are products being sold, the food is better (with a lot of choices), you can visit activity tents, see art installations, and kids, even babies are in attendance! 

I spent the first few hours of the festival by myself. I was able to move at my own pace, and just enjoy the moment.  During that time I stumbled upon an activity tent where festival attendees could make pouches, headbands, and different types of jewelry.  I decided to make myself some rings. 

This is probably one of my quickest and least thought out diy projects, but I loved the results!

 
IMG_7883.JPG
IMG_7776.JPG
 

THERE IS NO WRONG WAY: Have fun! 
Honestly, there is no wrong way to do this.  You can pick any rock/shell/crystal/bead of any size.  It is a statement piece, so I say the bulkier the better (:  
Materials: rings, wire, rocks/shells/crystals/beads, hot glue gun (optional), wire pliers (optional) 

 
IMG_7882.JPG
 

STEPS: 
1. Pick an object for your ring (any rock, crystal, bead, shell, etc. be creative!) 
2. Place the object/stone on top of the ring pad
3. (optional) Glue stone to ring pad
4. Wrap wire around stone and ring pad for security
5. Cut excess wire and tuck or wrap leftover wire behind stone

 
IMG_7865.JPG
IMG_7864.JPG
IMG_7866.JPG
 

I enjoyed my rings the rest of the festival and got to take them home as a small souvenir 

 
IMG_7886.JPG
IMG_7887.JPG
 

Patty came and joined me after work.  As much as I love alone time it is always better to experience life with loved ones.  I'm glad we could share this California day together.  Soon these will be rare and few. 

 
IMG_7885.JPG