Pumpkin Art

IMG_4882.JPG
 

It’s October!! Even before Noël was born I would paint a pumpkin every year. One year Benson even participated with me and we (more I) painted a Spiderman pumpkin! That being said, pumpkin painting is a tradition of mine, so you bet that is something I plan to do with Noël every year. Last year Noël was one, so she had a small pumpkin, we used sponges, and she only wore a diaper. This year, I let her do the real deal. She wore her regular clothes (I forgot to change her) and she got a regular sized pumpkin.

I let Noël pick all her colors and she had so much fun!

 
FullSizeRender.jpg
 

Materials: Pumpkin, acrylic paint, paint brushes/foam paint brushes, water bowl/cup, paper plates, paint pens , table cloth (shower curtain)

MY FIRST PUMPKIN: yay!
If this is your first time painting a pumpkin with your little one, yay! I am not going to lie, this particular project is a little more messy than others, but totally worth it. As you can see, I set up a shower curtain as our covering on the garage floor. I also placed a paper plate under the pumpkin (if your little one paints the entire pumpkin, this allows the pumpkin to dry normally on any surface).

 
IMG_4873.JPG
 

STEPS:
1. If your little one is old enough to say colors, let them pick a few. This is another opportunity to reinforce color recognition.
2. Set up your supplies. Put water in your bowl, ready the paper towels, place the pumpkin on the paper plate, brace yourself.
3. (optional) Add painters tape first to your pumpkin and later you can pull it off to create a different type of abstract look. We added the tape at first, but ended up just leaving it on. I wouldn’t do this in the future.
4. Let your little one use one color at a time. I would also use separate plates for contrasting colors or else you will just get brown paint. For example I placed all the warm colors on one plate and all the cool colors on another plate
5. Help your toddler rotate his/her pumpkin so the paint can be distributed all around
*also, paint pens can be used for detail or if you prefer less mess!

 
IMG_4874.JPG
IMG_4875.JPG
 

Noël was so proud of her pumpkin. She points it out every time we come home. If you want ZERO mess, have your little one just add colorful washi tape to a pumpkin. I got Noël a small white pumpkin and she added some yellow and gold washi tape to it.

 
FullSizeRender.jpg

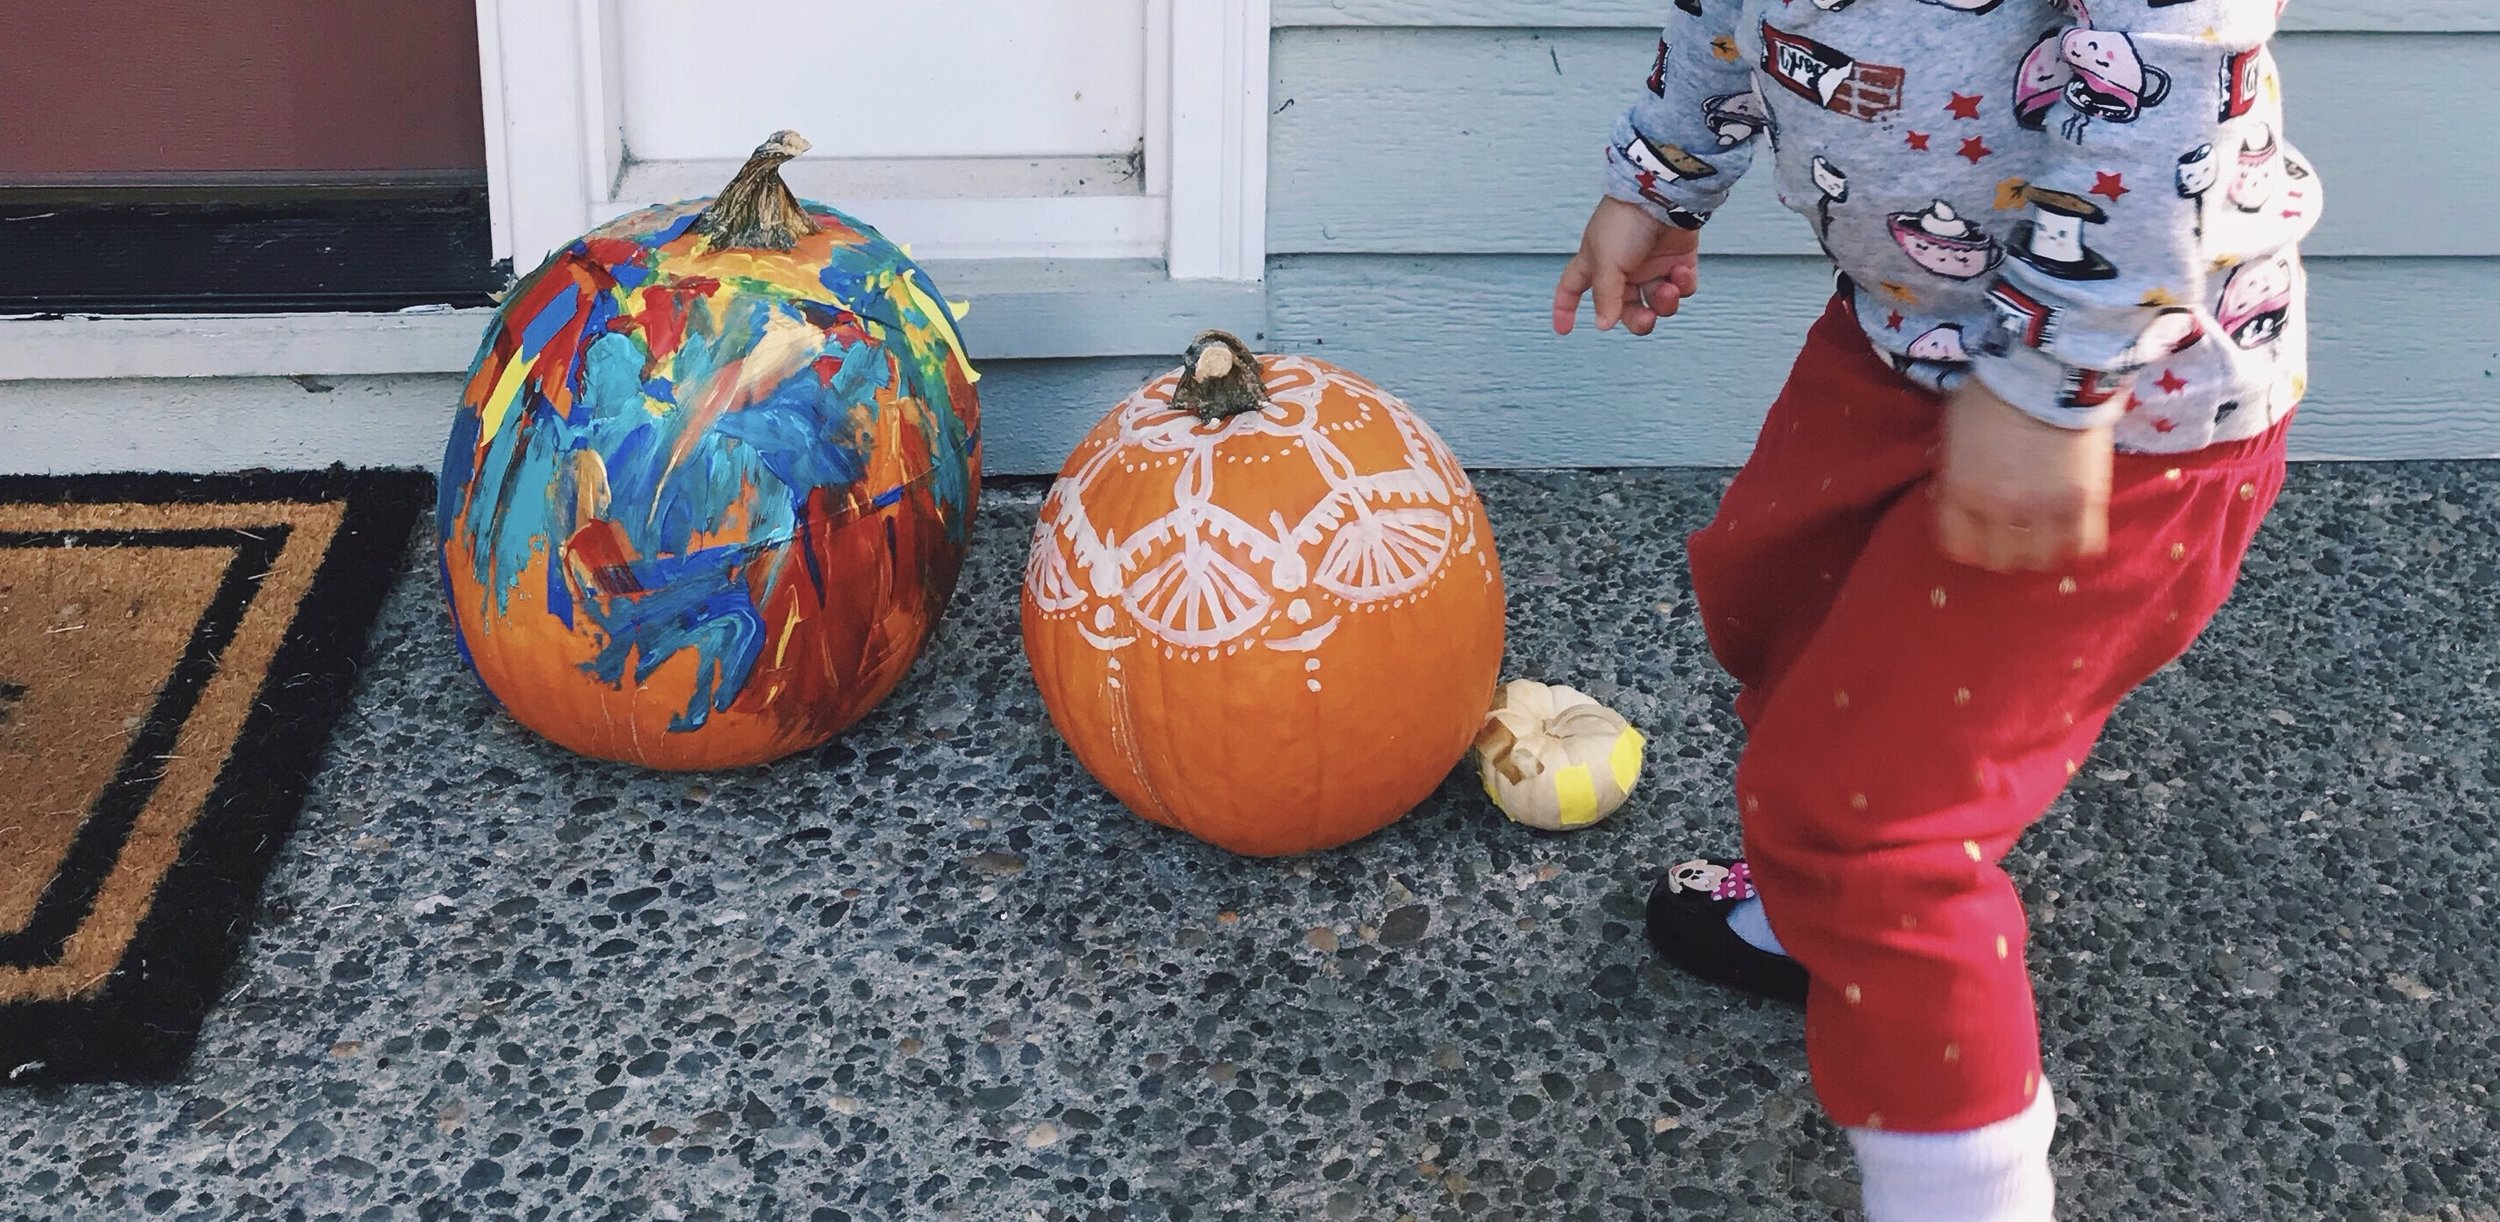
HAPPY FALL! (Please excuse Noël’s home clothes pajama set)

FullSizeRender.jpg

Bottle | Take 1

jaclynsue.com t1sensorybottle1
 

WE USED GLITTER! I prefer "adventurous" instead of "crazy" ahaha  

A couple of months ago I saw these Season Sensory/Discovery Bottles on another blog.  I loved the idea and I just had to do something like this with Noël.  Of course when I typed "sensory bottle" into Pinterest an endless list of DIY bottle ideas appeared.  I still love the seasons discovery bottles, but I am going to save that idea for a later time. 

I'm calling this post Take 1.  Today we kept it simple with shiny glitter and a few streamers.  

 
IMG_5815.JPG
 

FIRST TRY bottle one
Noël is pretty good about not putting things into her mouth.  I would also say she is on the neater side, so I decided to be adventurous and let her use glitter.  I know the use of glitter can be frowned upon with young ones, but looking back now I do not regret it.  She did a great job.  We did a thorough wipe down and clean up after, so I would say overall this was pretty successful.  If you are a little more hesitant about your young one, beads or legos work nicely.  I also think adding a few streamers showed some extra movement inside.  
Materials: Voss bottles (suggested, but any water bottle will do), clear glue (glitter glue), warm water, chopstick, superglue
Your choice materials: beads, legos, buttons, rice, glitter, streamers, rocks, waterbeads, sand, etc. 

 
IMG_5816.JPG
 

STEPS
1. Fill 1/3rd bottle with warm water
2.Add 1/4th of glue bottle to warm water, stir with chopstick
3.Add material (we used different colored glitter and gold streamers) 
4.Fill the rest of bottle with warm water
5.Super glue lid shut

 
IMG_5814.JPG

I told Noël B the water was hot, so be careful. She proceeded to blow into the bottle to cool it down (: 

IMG_5812.JPG
IMG_5813.JPG
IMG_5810.JPG
jaclynsue.com bottle1 1
IMG_5817.JPG
jaclynsue.com bottle1 2
jaclynsue.com bottle1 3
 

What do you think?  There are so many more sensory bottles ideas.  I'm deciding if we should do color focus bottles or an ispy next. 


Beginners Paint


I am so excited to share my love of art with my daughter and now you!

 
letspaintjaclynsue.com.jpg
 

For some reason paint has the reputation of being the most "artsy" art medium.   
And as an art teacher I could not wait to let my little one paint. 

Note:
Now mamas, don't be afraid of paint. Actually, painting with a toddler doesn't have to be scary at all! I love painting with Noël.  She wears her normal clothes and it's awesome to see her face light up when she sees her creation. 

For those of you who would like to try this at home.  Here are three awesome ways you can paint with your child.

FIRST STEP: So this is your first time buying art materials
Materials: water, jar/bowl (I prefer something heavier or lower and with more surface area.  This helps minimize spills), towel (you/something will get wet), construction paper, variety pack paint brushes (allow your child to try out different size brushes)
No Real Mess- Okay, so this is your first time painting with your young one. If you're worried about the mess, don't. Start off with painting water. Cheap construction paper absorbs water wonderfully. You will see a contrast in color and guess what?! Your worse spill will be of water! Which in my opinion is the best kind of spill. 

 
letspaint2jaclynsue.com.jpg
letspaint1jaclynsue.com.JPG
 

GO FOR IT: Do it!
Materials: water, towel, variety pack paint brushes, any light colored paper (your young one is exploring.  no need to buy expensive watercolor paper), watercolor palette
If you have watercolors or tempera paint lying around at home, go for it. A watercolor palette alone is just beautiful to look at. Best of all, a cake watercolor palette is dry until activated by water!  So if your a little nervous, give your little one a dry brush and dry palette to play with before adding water. 

 
letspaint3jaclynsue.com.JPG
letspaint4jaclynsue.com.JPG
 

ADVENTUROUS:  Try something new?
I love liquid watercolor. If you are afraid of spills, keep a close eye on your child.. but liquid watercolor guarantees color every time the brush is dipped. 

 
letspaint5jaclynsue.com.jpg
 

So what do you think? Share with me your painting experiences.  I'd love to hear them!