Cookie Monster

It's 10pm and I feel like making cookies 

IMG_9334.JPG
IMG_9335.JPG
IMG_9337.JPG
IMG_9338.JPG
IMG_9344.JPG

1. Preheat oven to 350 degrees F (175 degrees C).
2. Cream together the butter, white sugar, and brown sugar until smooth. Beat in the eggs one at a time, then stir in the vanilla. Dissolve baking soda in hot water. Add to batter along with salt. Stir in flour, and M&Ms. Drop by large spoonfuls onto un-greased pans.
3. Bake for about 12 minutes in the preheated oven, or until edges are nicely browned.

Pumpkin Painting| diy

Another Mommy & Me crafts day! 

IMG_7134.JPG
jsue pumpkin 7.png
jsue pumpkin 8.png
jsue pumpkin 9.png
jsue pumpkin 10.png

We took a bath after all this.. 

What a beautiful mess. 

Things Learned: No tape necessary.  I thought tape would be a great add to our painted pumpkin.  Ideally it would give nice clean abstract lines, but my one year old was so good at taping I think we overwhelmed our pumpkin with tape. After we removed the tape, there was barely any paint left.  Note for next time- no tape. It looked beautiful and abstract without the tape. 

IMG_7187.JPG

I decided that we need to add more color since all the tape had most of the paint.  We added pom poms and washi tape. I helped Noël B use a glue stick to attach the pom poms.

jsue pumpkin 6.png
jsue pumpkin 5.JPG
jsue pumpkin4.JPG
jsue pumpkin 3IMG_7211.JPG

A pretty good first time

jsue pumpkin 1.JPG
jsue pumpkin 2.JPG

Picture Cards | diy

Supplies: Any Magazine, Markers, Glue, Blank Cards & Envelopes and Scissors. 

1. Look through your magazine to find any pictures that have hands, fingers, funny faces, memorable characters, pretty colors, jewels, patterns, etc. 

2. Cut out your favorite pictures

3. And glue!  Leave it blank or feel free to add some clever captions (: 

So far my favorite cards look they are giving a thumbs up.  These will probably be congratulation cards.  The actual picture is a women holding onto a clutch.  Not bad huh??

Plant Pockets- Helpful Hints | diy

Elizabeth found this DIY project for us to tackle on Design Love Fest.  The directions seemed simple and the supplies were easy to get, but as we were creating our plant pockets, we discovered some easier ways to complete this project.  

This is not a "normal" DIY post, instead it is more of a "helpful hints" page.  Please read how to create your own original plant pocket on Design Love Fest first, then read my site for some helpful pointers.  Have fun!

Original Supplies List: 
• Air dry clay (we used Crayola)
• Rolling pin
• Canvas about 18 x 24 inches
• Exacto blade
• Ceramic pin tool (available at art and craft stores)
• Sandpaper
• Craft or spray paint
• Tissue paper or newsprint and drawing paper
• Small sponge

My Supplies List: 
- Air Dry Clay (use Michael's 40% coupon ) 
- Rolling Pin
-Cutting Board
-Exacto Knife/Blade
-Pencil
-Newspaper & paper
-Acrylic Paint


1. Elizabeth decided to make the same circular pocket as Design Love Fest, but I wanted to try something different.  I made hearts.  

2. Instead of canvas, we used a cutting board.  A cutting board is more accessible and it served the same purpose. 

3. A ceramic pin tool is definitely not necessary.  Use your Exacto knife instead to score the edges where your two pieces will meet to form the pocket. 

4. Wet your finger instead of a sponge to help the coil stick to the other piece of clay

5. Be careful.  When you attach the second piece, use your fingers to help structure the pocket.  It is actually kind of flimsy and could crack, rip or dry weird. 

6. Use a pencil (eraser side) instead of a ceramic pin tool to puncture a hole for a future nail

7. Lastly, paint the outside layer to leave a smooth finish

Hopefully I was able to give you a few helpful tips.  Let me know if you decide to do this DIY as well.  I'd love to compare notes (: 
P.S. Don't you think my final products are fitting for a little girl's room?

one Banana Smoothie please| diy

Two words: Banana Smoothie.  

When I get home from work I am HUN-GRY!  I want to eat something right away, but I also want it to be healthy... And although I am super hungry, I am most definitely not ready for dinner.  My good friend Lina, the heiress to the I Love Boba franchise, shared this recipe with me, & it has changed my life.  

This recipe is easy to make, filling & tastes great!
The ingredients are simple:

www.jaclynsue.com

 My mum & all her friends swear by a Vitamix, so we bought one last year. 

www.jaclynsue.com

I add all the ingredients into my Vitamix, EXCEPT the chia seeds.  I add the chia seeds directly to my glass.  I found that if I blend all the ingredients together, the chia seeds get stuck to the sides of my Vitamix. 

Banana Smoothie 3.JPG

After you've blended your ingredients for about 20-30 seconds, poor your drink into a tall glass, add your chia seeds, mix & enjoy!

Try it & tell me what you think!

Wall Plants | diy

A "Mummy & Me" Project  
My mum is super hip! She bought some air plants online for a home decor project.  Now, this awesome piece is part of our wall gallery.  Do you like?

jaclynsue.com WP1
jaclynsue.com WP2

Supplies:
Air Plants , Drift Wood (Check your local beach or search "drift wood" on Etsy,  I saw a lot of options), Scissors, Fishing Line/Nylon String, (Optional: Moss

STEPS: 
1. Tie Fishing Line:  Wrap & tie the fishing line tight around the drift wood.  Then cut the loose ends. 
I used fishing line instead of glue so I could remove my plants easily for watering. FYI: I used 7 different strings to help hold up my 5 air plants
2. Insert Air Plants:  Place air plants in the natural drift wood crevasses. 
I used the fishing line to help hold parts of the plant down.  NOTE: the entire plant does not need to be "glued" to the piece of wood. Choose leaves that naturally fall closer to the wood to place under the fishing line. 

jaclynsue.com WP3.png
jaclynsue.com WP3

3. Optional// Add Moss:  I decided not to add moss.  Moss would need to be glued down, and that would make it more difficult to remove later for watering.  Aesthetically though, it does add a platform for the air plants.  


Good Luck!  Maybe, I should sell.. 

jaclynsue.com WP5

Table Beautification | diy

jaclynsue.com TBDIY1

This was a leftover side table from Jonnyboy's college apartment.  I have some mixed feelings about Spanish Cedar wood- it is a little too red for my taste... but we needed a table, so thank you Jonnyboy (: 

Supplies:

-One 2oz bottle of Acrylic Paint (I used Vanilla)
-Paint brushes 
-Ruler
-Pencil
-Paint palette 
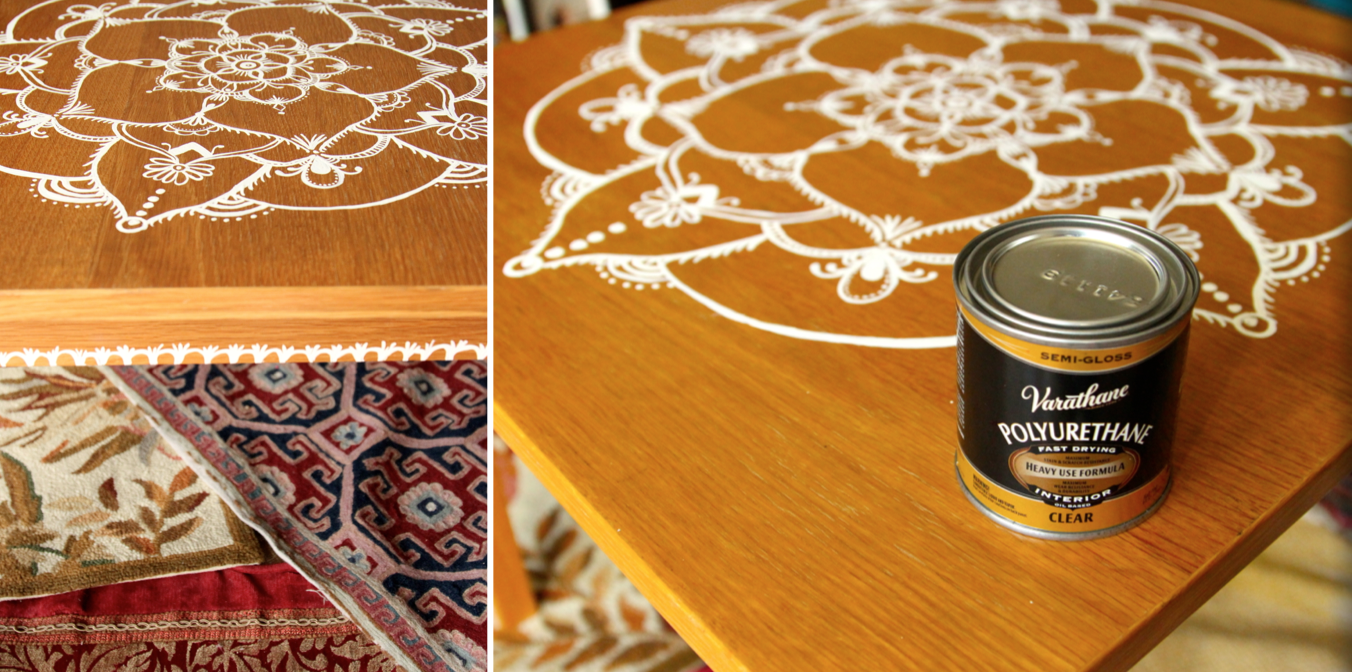
-Clear sealant 

jaclynsue.com TBDIY2
jaclynsue.com TBDIY3

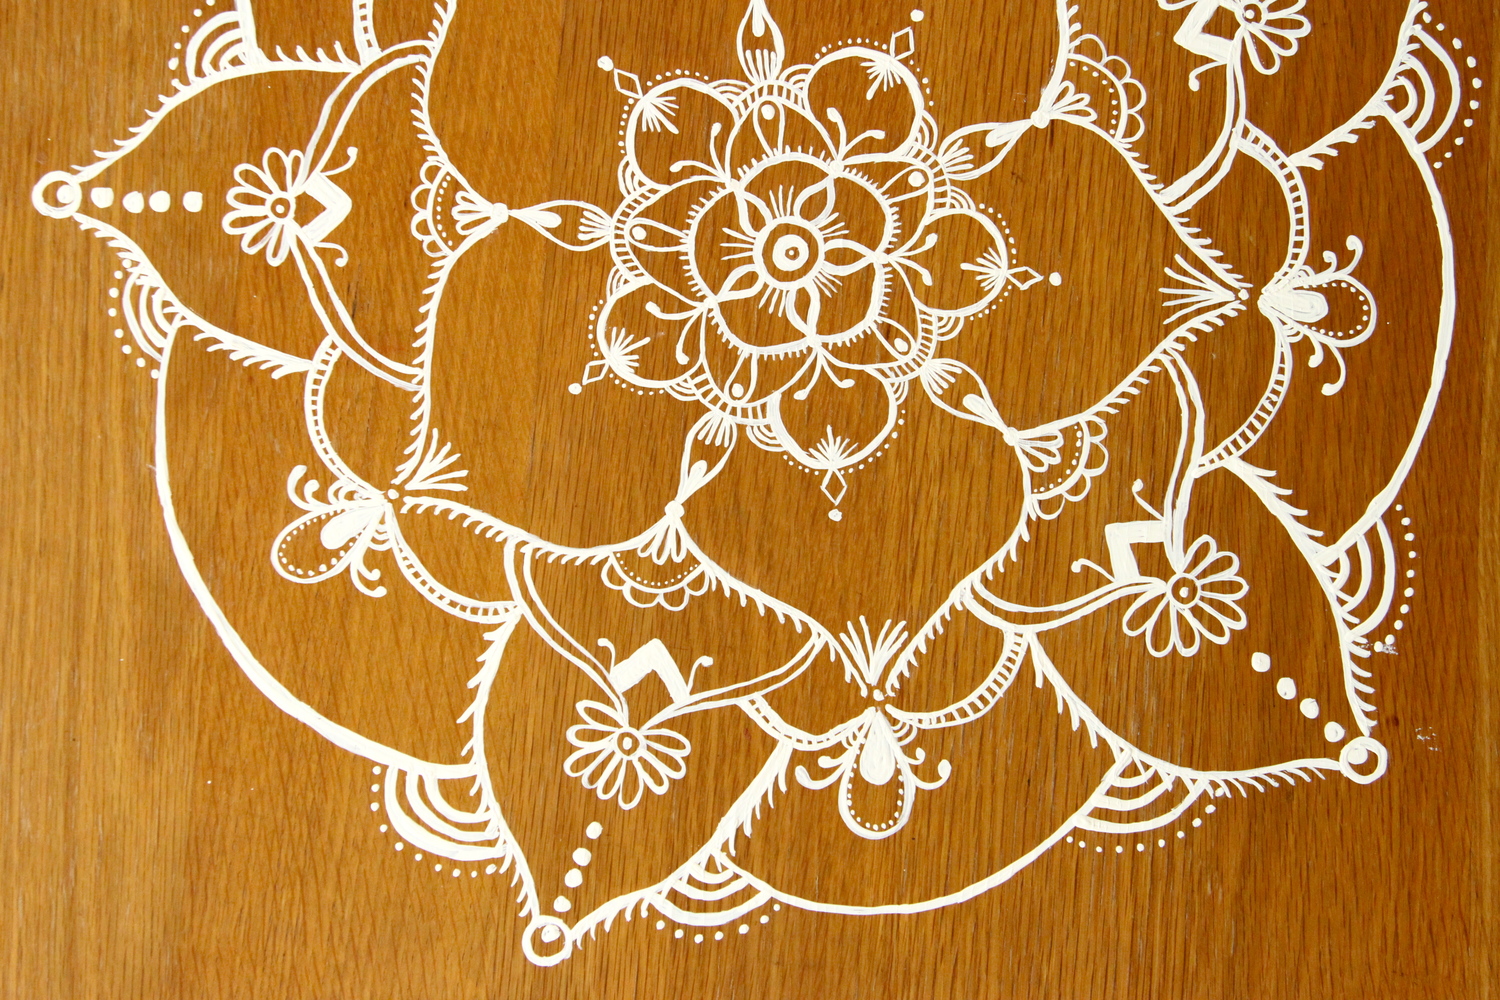
First, you will want to make sure the table is clean.  (Since I was not planning to paint the entire table I opt out of sanding and adding a primer.)   I decided to paint a mandala.  That was actually the last lesson I taught my students before summer & I thought the mandala design would make a perfect accent for the table top.  Plus, I love a good bohemian look. 

jaclynsue.com TBDIY4

I used a ruler to draw two lines, forming an X, from corner to corner.  Then, I lightly marked the center with a pencil.  Now, I get impatient when it comes to getting out my ideas.  And since I have drawn many mandalas before I decided to free hand my table.  If you feel confident, I say: DO IT TOO! But if not, I found this site that allows you to print mandala designs.  Use this site as a guide but honestly, try to create a pattern on your own!

Also, the beauty about acrylic paint from a bottle, is that while the paint is still in liquid form you could do a quick wipe on any mistake and it is gone!  

Start creating your mandala from the center and move outward.  I walked around the table to make sure I created each side as even as possible.  

Lastly, I added a small design on the sides of the table & then painted on my sealant. 

Ta-da! Let me know what you think!  Also, share with me your mandala designs; I'd love to see them!!